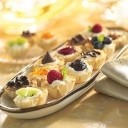
Creamy Mini Tarts Recipe
Prep Time 1 hour
by Eagle Brand
Get the great taste of yummy creamy mini tarts for an easy, crowd-pleasing treat.
What you'll need
4 (1.9 oz.) boxes mini fillo shells
1 can (14 oz.) Eagle Brand® Sweetened Condensed Milk
1 package (8 oz.) cream cheese, softened
1/3 cup lemon juice
1 teaspoon vanilla extract
Toppings of your choice (see below)
Notes:
Makes 60 mini tarts
How to make it
- Beat cream cheese in large bowl until fluffy. Gradually beat in sweetened condensed milk until smooth. Stir in lemon juice and vanilla until blended. Spoon about 2 teaspoons into each mini shell. Refrigerate 2 hours or until firm.
- Jam Tarts: Make a slight indentation in the filling using the back of small round measuring spoon. Fill with 1/2 teaspoon preserves. Use different flavors of Smucker's® preserves or orange marmalade to create a colorful assortment. Garnish with mint leaves. Refrigerate until ready to serve.
- Fresh Fruit Tarts: Top mini tarts with fresh fruit such as strawberries, blueberries, bananas, raspberries, cherries, kiwi, grapes or pineapple. Garnish with mint leaves.
- Hot Fudge Tarts: Place 2 tablespoons Smucker's® Hot Fudge Topping into corner of resealable plastic bag. Cut small corner off bag. Squeeze to drizzle over top of mini tarts.
- Chocolate Tarts: Melt 1 cup semi-sweet chocolate chips. Stir into filling until blended. Fill mini shells. Sprinkle with mini chocolate chips.
- Peanut Butter Tarts: Stir 1 cup Jif® Creamy Peanut Butter into filling until smooth and blended. Fill mini shells. Top with foil-wrapped milk chocolate pieces, unwrapped.
- Mocha Tarts: Completely dissolve 2 tablespoons Folger's Instant Coffee Crystals® in lemon juice before adding to cream cheese mixture. Fill mini shells. Top with chocolate curls.
More link
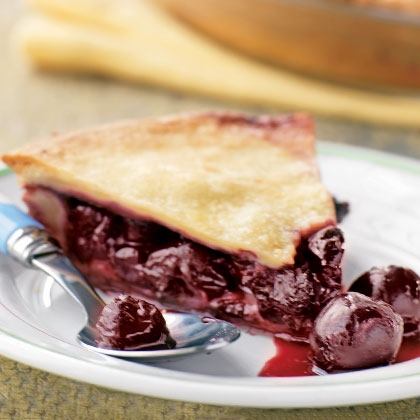
Cherry Pie Recipe
Prep Time 45 minutes Cook Time 40 minutes
Fresh cherries are the star of this summer favorite. The kid-friendly recipe makes for a fun collaboration between you and your junior baker.
What you'll need
- 4 cups cherries (1 1/2 to 2 pounds), washed
- 1 cup sugar
- 1/4 cup cornstarch
- 1/4 teaspoon almond extract
- 2 frozen 9-inch pie crusts
- 2 tablespoons salted butter, cut into bits
Notes:
Serves 8
How to make it
- Preheat the oven to 400° F.
- Together, you and your child can stem and pit the cherries. (Do it the old-fashioned way with your fingers, or try a handy cherry pitter.
- Measure out the sugar, cornstarch, and almond extract, then ask your child to add these to the cherries and gently stir together.
- Let one pie crust thaw for 10 minutes, then have your helper prick the bottom of it all over with a fork. Bake this crust for 8 minutes, then remove from the oven and cool for 5 minutes.
- Meanwhile, remove the other crust from the freezer and have your child pick off the fluted rim; this will be your top crust. Let it thaw for 10 minutes. Then your helper can cut a few 1-inch vent holes, using a butter knife or cookie cutter.
- When the bottom crust has cooled, pour in the filling and dot with butter. Let your little sous-chef carefully invert the top crust, still in the pan, onto the filling and lift the pan off. Place the pie on a foil-covered baking sheet and bake until the filling bubbles and the crust is golden brown, about 40 minutes. After 30 minutes, check to see if the crust is getting too brown; if it is, cover pie with an aluminum-foil tent. Let cool about 15 minutes before serving.
More link about food
Bassinet Cake

This Great Cake Contest entry was submitted by turtlebugmama from Norfolk, Virginia: A cake made for a baby shower
What you'll need
- 2 Box cake mixes of your choice
- Buttercream frosting
- Premade Fondant
- Gel frosting colors
- Approx. 12-18 inches of lace trim
How to make it
- Bake 1 cake mix in a 13 by 9 inch pan according to box directions. Bake 1 cake mix in 2 9inch round pans (you will only use 1, so you'll have one to keep)
- Cut one of the round cakes in half, put a layer of frosting on one half and stack the other half on top, making a half circle. Frost the 13 by 9 cake with colors of your choice. Rest the half circle cake on the top, 9 inch side of the cake to form the shade of the bassinet. Frost the shade to match the bottom of cake.
- With gel frosting colors, tint a small ball of fondant to desired skin tone. Separate 2 small pieces to make hands. Tint another small ball the color of your choice to make a pacifier. A small thin roll of white fondant can make the pacifier handle. Flatten large fondant ball to head shape, molding a nose and indents or half circles for closed eyes. Use a knife edge to push finger indents into the small skin colored balls for hands.
- Use gel colors to paint eyelashes, hair and rosy cheeks. Assemble baby parts onto cake and frost with stars or flowers across the hands to make the blanket. Frost around head with lace tip to make a bonnet. Small dots above the hands look like sleeves of jammies.
- Finish the blanket with quilt lines, flowers and writing. Trim top edge of the round shade part of cake with lace, pushing it gently into the frosting. Cover lace edge with flowers to match the cake. The back of the cake can be decorated with baby's name or initials if known."
More link about food
Caesar Coleslaw Recipe
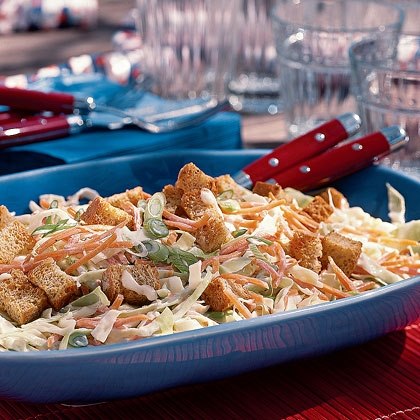
Prepare this new take on coleslaw the day before serving, refrigerate, and allow the dressing to soak into the salad.
What you'll need
CAESAR DRESSING
- 1 cup low-fat mayonnaise
- 3 tablespoons fresh lemon juice
- 1/2 teaspoon minced garlic
- 1 teaspoon anchovy paste
- 1 teaspoon Dijon mustard
- 1/2 teaspoon freshly ground pepper
SALAD
- 8 cups shredded savoy or green cabbage (about 1 small head)
- 2 cups shredded carrots
- 4 scallions, thinly sliced
- 2 cups croutons
How to make it
- Make the dressing: in a large serving bowl, whisk together the mayonnaise, lemon juice, garlic, anchovy paste, mustard, and pepper.
- Add the cabbage, carrots, and scallions to the bowl and toss to coat. Cover and refrigerate the salad until ready to serve. Top with croutons. Serves 6 to 8.
More links about food:
Share collections of news, crafts, recipes, food, travel, Tips and Tricks...
Banana Chips Recipe

Prep Time 8 minutes Cook Time 3 hours
I love to bring my daughter in the kitchen and teach her about healthy eating habits while cooking. The other day she asked me what would happen if you put a carrot in the oven for a very long time. Of course, after I told her it would be either hard or rubbery and overcooked, she wanted to give it a try. So we put a whole carrot and carrot slices in the oven and cooked for 3 hours. The results of the whole carrot are what you would expect (not so appealing), but the carrot slices turned out to be nice, crispy chips.
Now she was enthralled and wanted to see what would happen with all sorts of vegetables and fruit if baked for a long time in the oven. Not only was her imagination going wild, but her cognitive wheels were turning. It was amazing to see her as a little food scientist. Her favorite experiment was the banana chips. They weren't exactly the crispy and crunchy banana chips you can by in the store. Those are deep fried and absolutely addictive, so I was hoping baking banana slices in the oven would turn out crispy; they did not. What happened, though, was a delightfully sweet banana chip that resembled fruit leather.
Before I knew it she had eaten the entire batch. Chewy, naturally sweet and delicious, homemade banana chips are not only a healthy snack but a fun experiment when raw fruit snacks need a little boost!
by Meredith Steele
What you'll need
- 2 bananas
How to make it
- Preheat oven to 250°F.
- Peel and slice the bananas into 1/8-inch rounds. Place slices on a parchment-lined baking sheet and place in the oven. Bake for 3 hours, flipping once halfway through. Cook until dried and no longer wet; they may remain sticky. Remove from the oven and allow to cool for 15 minutes. The chips will harden and firm while cooling. Store in a covered food container at room temperature for up to 3 days.